Your recliner is your best friend, every evening after that long day at work. It provides the quiet space that you need in order to process that energetic day and relax in front of the television, or to read your newspaper or favorite book.
Not to mention, you have probably had this recliner for decades, and when it comes down with a crippling condition, your recliner-doctor instincts naturally come to the rescue.
Still, there are some things you want to know, like what tools to get, and how exactly to repair a recliner (as quickly and as pain-free as possible). Therefore, we have provided the necessary steps, and helpful tips, to help you get your recliner back to living its healthy, sturdy, and comfortable life. Because, let’s face it, who would you be without your recliner?
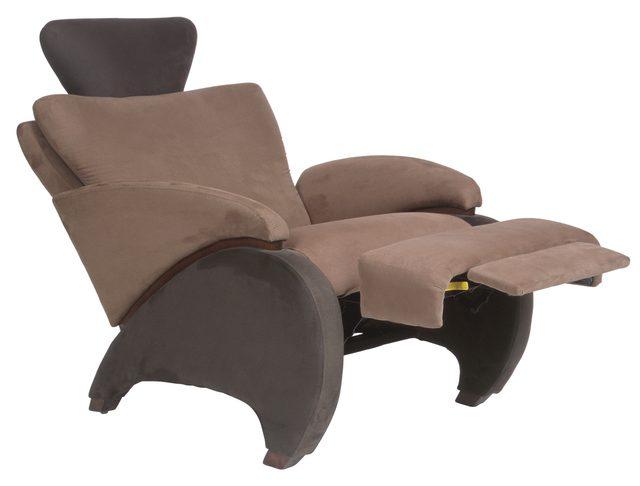
Anatomy of Your Recliner
Your recliner is not just a chair with four legs. Instead, it has about five different key features: springs, cable, pull handle, chair back, and footrest. Within these five components, different things can get broken or in need of extra attention. We have broken down the next part of this how-to article into a number of different sections so that you can easily determine which part of your recliner is broken, and then how to fix it.
Tools that You Should Have
Depending on the type of repair that you do, the necessary tools will vary. Still, there are certain things you should have handy no matter what could be wrong with your recliner. You should have a flathead screwdriver, and adjustable wrench, and a flashlight. You can use all of these tools for the following different reparations, plus a couple more.
When fixing your recliner, you will need some tools. Be sure that you collect the following: a lubricant, like WD40, wood glue or toothpicks, patch kits, any suspected replacement parts, and a notepad and pencil for taking notes.
How to Repair Different Recliners’ Parts
How to Repair Your Recliner’s Springs
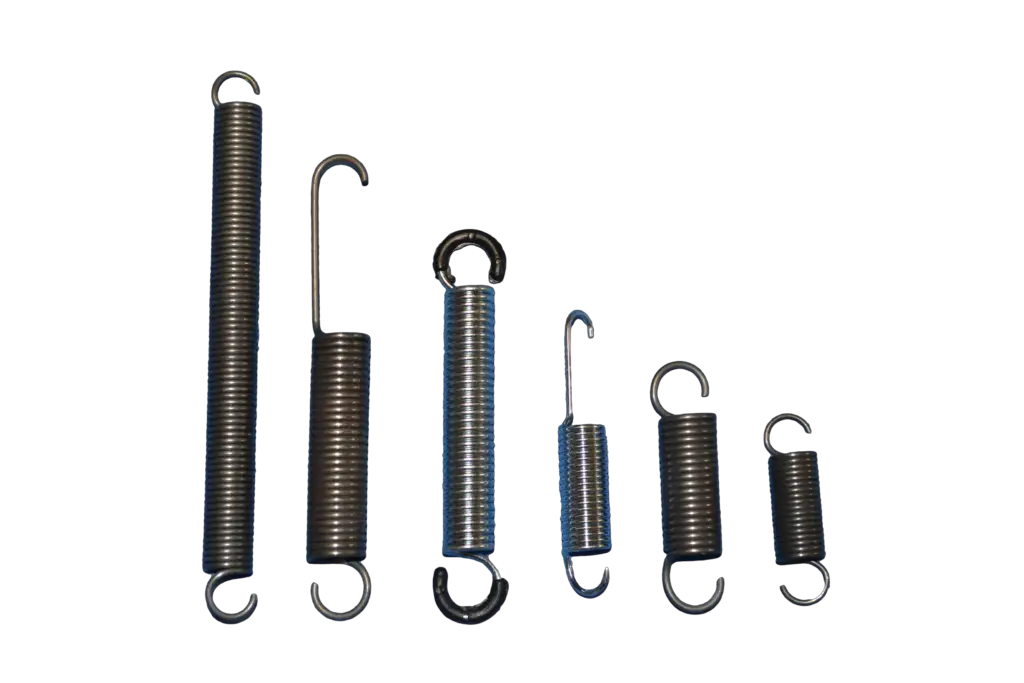
If your chair has lost its comfort, it could be due to the springs. To check the springs, you should first:
- Flip your recliner upside down and glance at all the springs. Look to see if any have disconnected, broken, or have excessive wear. If you notice any that stand out, take them off using your adjustable wrench.
- To do this, you will remove the bolts on the foot rest as well.
- Once you have your replacement spring, put it on the recliner. Then flip it over to its proper sitting position for a test sit.
How to Repair the Pull Handle
If you suspect your pull handle is broken, which could be the case if your foot rest is not working, you can fix it pretty easily. Before starting, make sure the foot rest is closed:
- Flip the recliner over and search for the screw that goes to the pull handle. You will notice there is a cover to your pull handle, which is called the escutcheon. Remove the handle and the escutcheon.
- Once you get your replacement, you can attach it by tightening the screw. When finished, turn the recliner to its natural sitting position.
How to Repair the Chair Back
Your recliner will have one of three types of recliner backs: locking lever, which means there are brackets attached to the sides of the back (unhinge them to take off); bolted on backs, which means the back is bolted on beneath a panel on the chair back (unbolt them to remove the back); or locking tabs/catches, which means the back is locked into place (unlock the,pm by using a flathead screwdriver). For a more in-depth visual process, check out this video tutorial:
How to Repair Your Recliner when it will not Recline
If your recliner is not reclining, you can suspect either the cable system or the arm, or maybe even both. These two work together to help the chair recline. If it is the cable, follow the steps listed after this how-to guide. If it is the arm, you should:
- Remove the cushion to reach the lever. If the lever fell off, put it back on. But, if it is broken or stripped, then you must replace it.
- When fixing the lever, ensure the nut and bolt is snug.
How to Repair the Cable
If your chair is still not reclining after checking the arm, it could be the cable. In addition, if the back of your recliner moves on its own accord, you can blame the cable. This is an easy task that could also possibly turn into a replacement:
- You first need to pull the cable tight by releasing the cable stop. Be sure the cable is held against its piston bracket.
- If you need to replace the cable, flip the chair over, and unscrew the bolts that are on the foot rest and the ones that connect the squab to the chair’s frame.
- Once you remove the squab, you can replace the cable.
- Finally, attach the squab and bring the chair right side up.
Here is a video tutorial for a step-by-step visual guide:
How to Repair Your Lopsided Recliner
If your recliner is lopsided, you should check several things. The problem could possibly be a worn down or broken part. This type of repair is more ambiguous, to be prepared to problem-solve.
- Turn your recliner over and examine the springs by tightening and replacing them as needed.
- Fill up the spring holes with wood glue or toothpicks to make the holes smaller. If the springs are mounted on metal, you can tighten the attachments. As a last resort, you can buy a new mounting plate.
How to Repair Your Recliner’s Foot Rest
Your recliner’s footrest also has multiple parts that could be in need of special attention. These parts contribute to the problem of whether your footrest is jammed, stuck in the open position, or refuses to latch into place.
Jammed Foot Rest
If your foot rest is jammed, you should:
- Flip the recliner over and locate the ratchet, which is attached to the footrest.
- Open the bar and disassemble the bar by removing the spring and pins.
- Before reassembling the ratchet, test whether or not the footrest will function properly. If it does not, you should continue to problem-solve. Look at all other parts of the footrest. You might need to lubricate some parts, in which case, grab some WD40.
Football Rest that does not Latch
If your foot rest is not latching, it could be the springs.
- Turn your recliner upside down and check all the springs for wear or damage.
- Replace the spring if it is overstretched or broken. This will help apply the normal amount of tension to the foot rest.
Foot Rest in the Up Position
This is especially annoying because you know how difficult it is to get out of your recliner. To repair, you can simply:
- Flip over your recliner, locate the screws that are attached to the frame, and loosen all of them.
- Protect your cushion’s bottom with an old cloth, and then apply WD40 on all of the joints.
- Try out the handle for any stiffness and then reapply the lubricant as necessary.
- Return the recliner to its proper seated position and then test the footrest.
If All Else Fails…
Maybe after all this, you still have a broken recliner. Do not lose hope. There are furniture mechanics who are trained and experienced in repairing recliner mechanisms. You can call the company where you first bought your recliner, or do a quick search online to find the nearest furniture “doctor.”
You can also check the recliner for any warranties. Sometimes the factory will replace your recliner if the damage meets the said requirements.
Repairing Torn Upholstery Ideas
Maybe your new puppy got to the chair, or maybe your chair has lived a long seventy years. Regardless, there seems to be a little extra wear than necessary on the cushions. Maybe there are holes and tears. Over time, this can lead to build up in the foam and cushion material itself. After a while, old upholstery can make itself known through bad odors, mold, and mildew. If not replaced, this can make you sick and the recliner completely unusable.
If your upholstery is showing signs of retirement before you do, there are several options you can take. For one, you can find fabric patches that match the exact design, color, and texture of your recliner’s material. Some of these can be applied using fabric glue, while others are adhesive. To apply patches, follow these steps:
- Cut the patch to fit the worn or torn area.
- Peal off the adhesive cover, or apply the fabric glue (as applicable), and then smooth the patch into place.
- Safely secure the patch in place by clamping it down, or applying a light weight.
- Always follow the instructions that come with your patch kit.
If your upholstery needs total replacement, you can either do it yourself (if you are a confident and talented seamstress), or you can contact an upholstery company. They will take many different dimensions. You can decide if you want the same material as before, or go for something new.
Replacing the Cushions
If you have noticed that your recliner is still uncomfortable after checking all of the above, it might be time to completely replace the cushions. Old cushions can cause discomfort and excess sagging in the chair. If there feels to be a big hole or vacant spot in the cushions, particularly where you normally rest your body, this could also be a sure sign that it is time to replace the cushions.
As an absolute last resort, you may have to say thank you and good bye to your recliner and then invest in a new one. Though before you make that decision, read on for some additional tips.
Useful Recliner Repair Tips
Before you go flipping your recliner over to check the bottom, or all out replacing your recliner, sometimes it helps to just get another person to try their hand at fixing the perceived problem. For instance, if the handle is having a hard time moving, have somebody else try to move it. It could be that the handle is slightly jammed, but a different arm is all it takes to get that stubborn handle to move again.
You may also want to be aware that toys and debris can get stuck in any of the parts of your recliner. These things can mimic damage, or get in the way of your recliner’s designed movement. To check for unwanted objects, simply turn your recliner over and observe all of the visible parts. Grab a flashlight if necessary. It is always a good idea to check out your recliner for objects before trying to make any repairs.
Finally, it is always wise to have a helper with you. The helper can assist in turning the chair upside down and back over again, which can be very difficult and even dangerous to do on your own. The helper can also keep up with nuts and bolts that might otherwise get lost in the springs or in the surrounding carpet. In addition, the helper could offer suggestions and ideas that you might have forgotten to consider. They could save you considerable time (and money) that you might have spent outside of your chair and with a professional repair company.
Conclusion
Fixing your recliner is a relatively easy process once you have determined what is wrong with your recliner. There are several different moving parts (literally) that you should check out. If your recliner is still having problems, even after you have replaced parts, maybe it is time to consult a professional. The professional will help you determine whether or not you should replace your recliner altogether. Nevertheless, once you are back in your recliner, all is well again, and you can continue your evening plans with comfort and ease.

James KenwoodJames is a professional in furniture sphere. He has 5 years of experience in working with all types of recliners. And now he shares his knowledge with people, who don't have time for research and who want to make the right choice for the future piece of furniture. More about writers