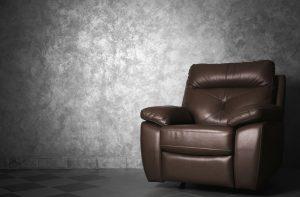
It might surprise you to learn that recliners can be easily and fully disassembled. This makes them better-than-expected candidates for a DIY upholstery project.
A recliner is not the best thing to use as your very first DIY upholstery project. But there are some tricks you can use to help make the job fit both your current skill level and the tools you have on hand.

First things first
First, you need to find a chair to work on. Maybe you already have one in mind, or maybe you need to hit a few yard sales or ask around if someone in the family has an old, unused recliner hidden away somewhere that they would be happy to donate to the cause.
Then it would help if you inspected the chair. Make sure the mechanism still works, and the arms are not too wobbly. Arms that are a little loose can be tightened up. But arms that are too loose can mean the chair is unsalvageable.
Decide on the scope of the project.
If this is a DIY project, you have a lot of latitude for how to handle things. You aren’t obligated to try to make it look exactly like a professional piece from the floor of a store.
You could decide to re-do one side of the seat cushion. That may be all that is needed to add some new life to an old recliner.
You could update the fabric but make it less tailored. It will be a more casual look but can vastly simplify the project. Keep in mind that baggy material needs to be kept out of the way and not interfere with the reclining mechanism.
If you are comfortable with a staple gun, but not a sewing machine, you can outsource the seat cushion portion of the project. You can take it to a local seamstress and have them sew a cover for the seat cushion, then do the rest of the project yourself.
Pick your fabric
Because recliners change positions, matching patterned fabric is inherently more challenging than usual. Even experienced people generally shy away from stripes, plaids and other strong geometric patterns for recliners.
Strong geometric patterns with a lot of straight lines are too hard to match. Going with paisley, floral or similar can let you skip the need to try to match everything.
Going with a plain fabric simplifies things even further. There is no pattern matching involved at all. It would help if you made sure the fabric has the right direction for each section.
If you choose a plain fabric, you can add some personality by using a contrasting color for the piping, adding studs or making one side of a seat cushion patterned. You can also use a throw to add both color and comfort to the chair without adding any extra work to the process of actually reupholstering it.
You will need between 8 and 12 yards of upholstery fabric to re-do the entire chair. You will need more if you are using a patterned fabric.
Workspace and tools
At a minimum, you will need:
- a good pair of scissors;
- tailor’s chalk;
- a staple gun;
- staples or possibly a glue gun.
You may need quite a few other tools as well, such as:
- a wrench;
- wire cutters;
- needle and thread.
If you are going to create a new cover for the seat cushion, you will need a sewing machine.
You should have a clean, dry space to work in, such as a garage or sewing room. Depending upon your living arrangement, you might get away with doing this in your living room. Just plan to clean up afterward.
Disassemble the recliner
It’s a good idea to take lots of photos as you disassemble it. Start by taking a few “before” photos of the chair in its upright position and its various reclining positions.
Make sure to stop and take photos of various parts as you disassemble it. You will be reverse engineering it. You need to be able to put it all back together again.
It should be possible to remove the back, though there maybe a couple of different ways to access this. Some chairs have a mechanism in the back of the chair that can be unhooked. Others only come off after you remove the reclining mechanism.
Remove the Fabric Sections Carefully
The various fabric pieces need to be carefully removed. You may need a seam ripper and a staple remover to help you with this process.
If you are going with a tailored approach, you will be using the fabric sections as patterns for your new upholstery fabric. Even if you aren’t, you should preserve the fabric to preserve your options. You may decide you have gone too casual and need to find a happy medium.
You can lay the fabric sections directly on the new fabric and trace around them with the tailor’s chalk. You can also use butcher’s paper or similar to create paper pattern pieces to pin to the new fabric. Then cut as you normally would.
Put It All Back Together
Once you have cut all your fabric pieces, you can start sewing and stapling things together. If you are going with a tailored approach, you may need to do a lot of sewing. There may be piping, buttons to re-cover, and other fiddly bits to handle.
If you are going with a more casual approach, you may be able to drape fabric over the sections and staple it in place without any sewing and fitting. You will still need to do things like cut notches in curved areas so the fabric doesn’t bunch up.
After each section has been reupholstered, you will then put the chair back together. Make sure the mechanism actually still works.
If it doesn’t work, you no longer have a recliner. You have a chair!
